Vegan Cheese – Soy/Nut Free Chickpea Vegan Pepper Jack Cheese
Soy Free, Nut Free, Dairy Free Vegan Pepper Jack Cheese
This spicy, flavorful vegan pepper jack cheese made out of chickpea flour is perfect for anyone sensitive or allergic to the standard vegan cheese recipes which contain soy or tree nuts.
Based on a classic recipe for Burmese chickpea cheese, this kicked up “Debsterized” version has a cheesier taste, and the tantalizing savory flavors of red pepper flakes and spicy Serrano pepper bits.
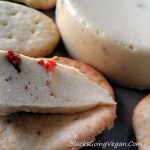
This vegan pepper jack cheese is perfect for slicing and serving with crackers at social gatherings, in grilled cheese sandwiches, to top your veggie burgers, in bean burritos or tacos, or cubed over salads. Chickpeas are highly nutritious on their own, but in this recipe you get a 1-2 punch. Vegans should also regularly ingest nutritional yeast, as it is an excellent source of Vitamin B12, one of the nutrients that vegans tend to be low on.
Combining nutritional yeast with chickpeas provides high doses of B12, folic acid, pantothenic acid, B1, B2, B3 and B6, as well as iron, protein and fiber. Definitely a winner!
This recipe makes a small block of vegan pepper jack cheese (about 10-12 oz container size). If you need more servings, feel free to double the recipe and fill 2 containers.
I wouldn’t recommend doing more than that, as the cheese thickens quickly when removed from the stove. It may be a struggle for you to handle fast enough to get it out of the pot and into the molds before it gets too stiff.
This vegan pepper jack cheese takes only minutes to make, and is ready to eat approximately 2 hours after placing in the mold (1 hour to cool on counter, 1 hour in refrigerator to chill and harden). The mold I used was purchased is the Snap Lock type shown below. Mine was on clearance at the $1.00 store for…a dollar! But these containers are BPA free, heat resistant, and have their own tight fitting lid which keeps the cheese fresh tasting for many days. Plus it travels well.
If you want to make the pepper jack cheese more of a spread than a firm, sliceable cheese, add an additional 1/4 to 1/3 cup of water to the pot. The more water you add, the less firm the cheese will be.

- ½ tsp red pepper flakes (or more as preferred)
- 2 Serrano peppers, white pith and seeds removed
- ½ cup garbanzo bean flour
- 4 Tablespoons nutritional yeast flakes
- 1 teaspoon sea salt
- ½ teaspoon sweet Hungarian paprika
- ¼ teaspoon ground cumin
- 1 teaspoon olive oil
- ½ cup water
- 1 teaspoon of fresh lemon juice
- 1 teaspoon sesame Tahini
- ½ cup water (for pot)
- Measure out red pepper flakes into small bowl.
- Measure ½ cup water and stir in the tahini, lemon juice, and olive oil. Set aside.
- Mince Serrano peppers and toast over medium heat in non-stick saucepan. Stir frequently to prevent sticking. You don’t want peppers to brown, just get a bit softer. Remove toasted peppers from pan and add to bowl with red pepper flakes.
- In medium mixing bowl, combine the chickpea flour, paprika, nutritional yeast, sea salt and cumin; mix well with sturdy whisk.
- Put ½ cup water into same non-stick saucepan; add red pepper flakes and minced Serrano pepper. Bring to a low boil.
- Pour in the water/tahini/olive oil mixture and whisk well until smooth and no lumps remain.
- Lower heat on boiling water to medium, then add chickpea mixture, whisking continuously to prevent lumps from forming. Continue to whisk for about 3 minutes while mixture cooks and thickens.
- Immediately remove from pot into 12-14 oz. heat-proof mold. Move quickly, as the cheese mixture cools VERY quickly and as it cools, it thickens. To avoid an uneven surface on your cheese and to eliminate air bubbles, gently tap container on counter several times.
- Cover your hand with a plastic glove and smooth top with your finger tips, pressing cheese down to remove remaining air pockets for a uniform appearance when removed from the mold.
- Let cheese cool on counter for 30-45 minutes, then cover mold and place in refrigerator for 1 hour.
- Remove from refrigerator, and turn out onto serving dish for appetizers, or slice and use as needed.
SHOP AMAZON
Category: Appetizers & Snacks


